Email Settings will save you some time when launching an email campaign since the information you enter in the Email Settings will automatically fill in the Campaign's required information, which means you won't have to input the same information over and over again.
If you wish to set up the Email Settings, follow these steps:
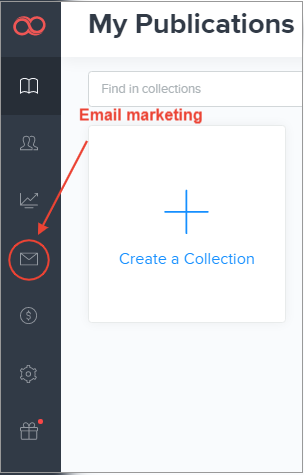
1. From your dashboard go to the Email Marketing section.

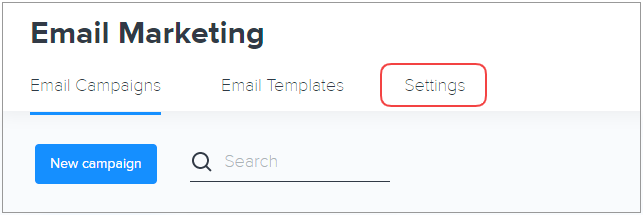
2. Go to the Settings tab.

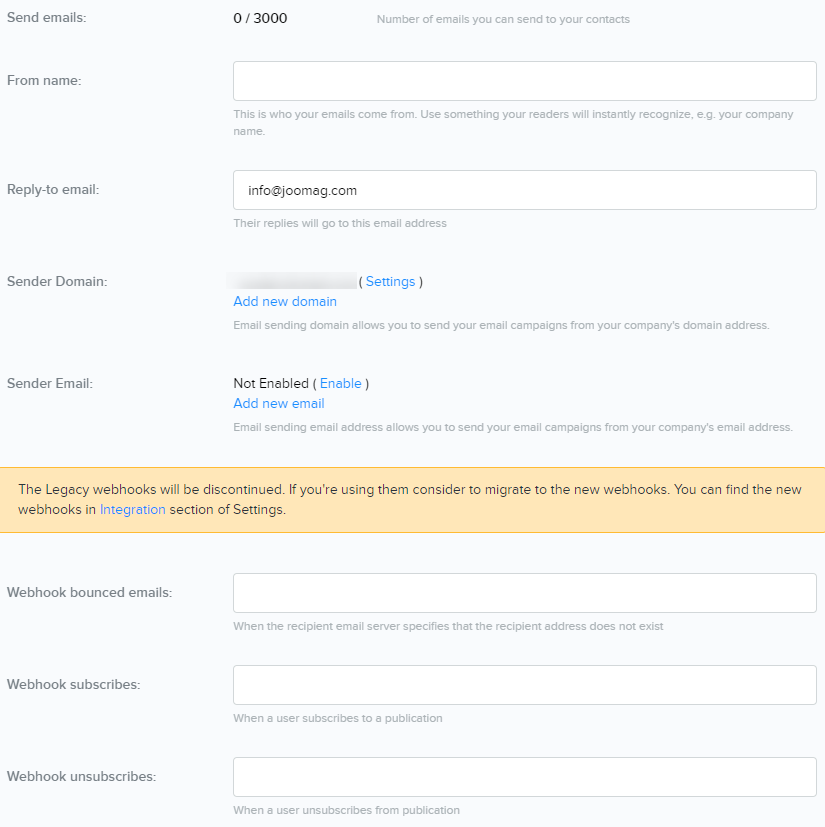
3. Here is the page you'll see:

Send Emails: Shows the total number of emails you can send to your contacts monthly.
-
The first number indicates how many emails you've already sent to your contacts for the current month.
In the example, 41 emails have been sent. -
The second number shows how many emails you can send to your contacts per month.
In the example, the limit is 12000 emails.
From Name: This field shows the recipient who the sender of the email is.
Tip: It's much better to use a company or brand name over a person's name unless that person is the brand.
Reply-to Email: Replies of your recipients will go to the email address you type here.
Sender Domain: The email-sending domain allows you to send your email campaigns from your company's domain address. You can easily set up the email sender domain.
Sender Email: You can use any email address to send your future email campaigns.
The next three fields are related to webhooks.
Webhook is a simple way with which your online accounts communicate with each other and share information. When an event happens on the trigger account, the system sends information about that event to the webhook URL you provided. Action account receives the data as a POST request and does something based on it. They work like messages your bank sends to your phone number when you make a new purchase and the webhook URL acts like your phone number.
Important: Make sure your IT team works with webhooks. If not, skip these fields.
Joomag provides its own set of webhooks:

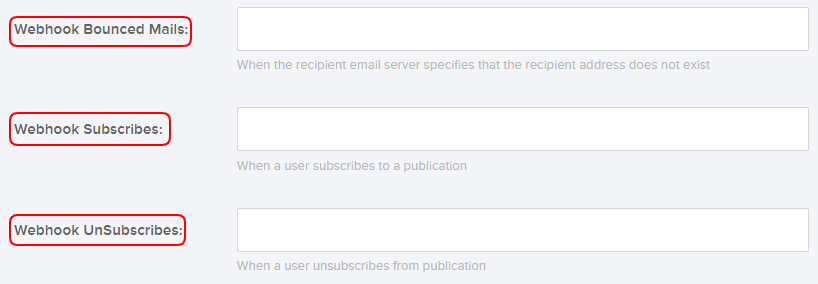
Webhook Bounced Mails: The URL provided here will receive a POST request when the recipient email server specifies that the email address does not exist.
Webhook Subscribes: The URL provided here will receive a POST request when a user subscribes to a publication.
Webhook UnSubscribes: The URL provided here will receive a POST request when a user unsubscribes from publication.
4. Once you're done, click Save changes.
Here you go, now you know how to set up Email Settings!
