For a variety of reasons the important emails you should be receiving from Joomag may appear in the Spam folder instead of your inbox. In order to prevent the messages from appearing in Spam, you should whitelist the sender's email or their domain. Whitelisting basically means approving the domain as a trusted sender, so that you receive new emails from this sender directly to your mailbox.
Here you may find step-by-step instructions for whitelisting Joomag's domains in
Gmail
Note: You'll need to log in to your Gmail account first.
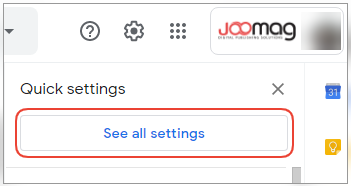
1. When logged in, find the Settings icon.

2. Click the See all settings.
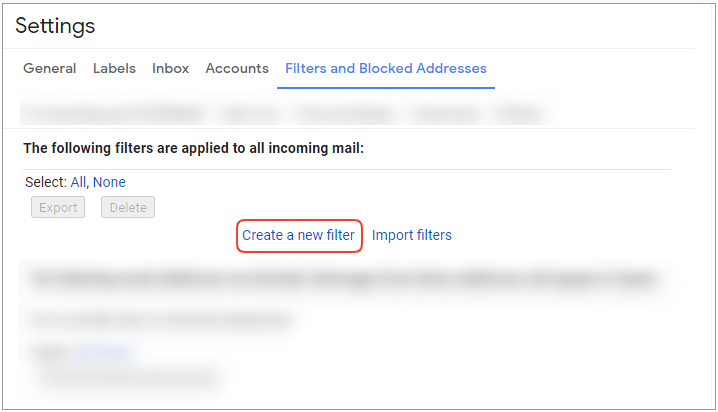
3. Open the Filters and Blocked Addresses tab.

4. Click Create a new filter link.
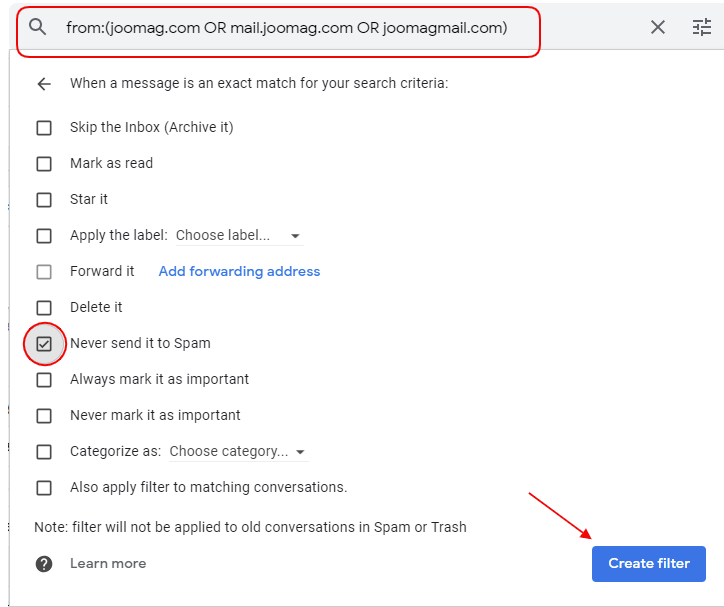
5. In the From box type "joomag.com"; "mail.joomag.com"; "joomagmail.com" as shown in the screenshot below and click Create filter button.
6. Check the Never send it to Spam box for each of the domains and click Create filter.
Tip ☝ You can also check the Always mark it as important box not to miss any important email related to the billing settings.
Yahoo! Mail
To whitelist Joomag domains in the Yahoo mail, make sure you are logged in to your Yahoo Mail account. Then:
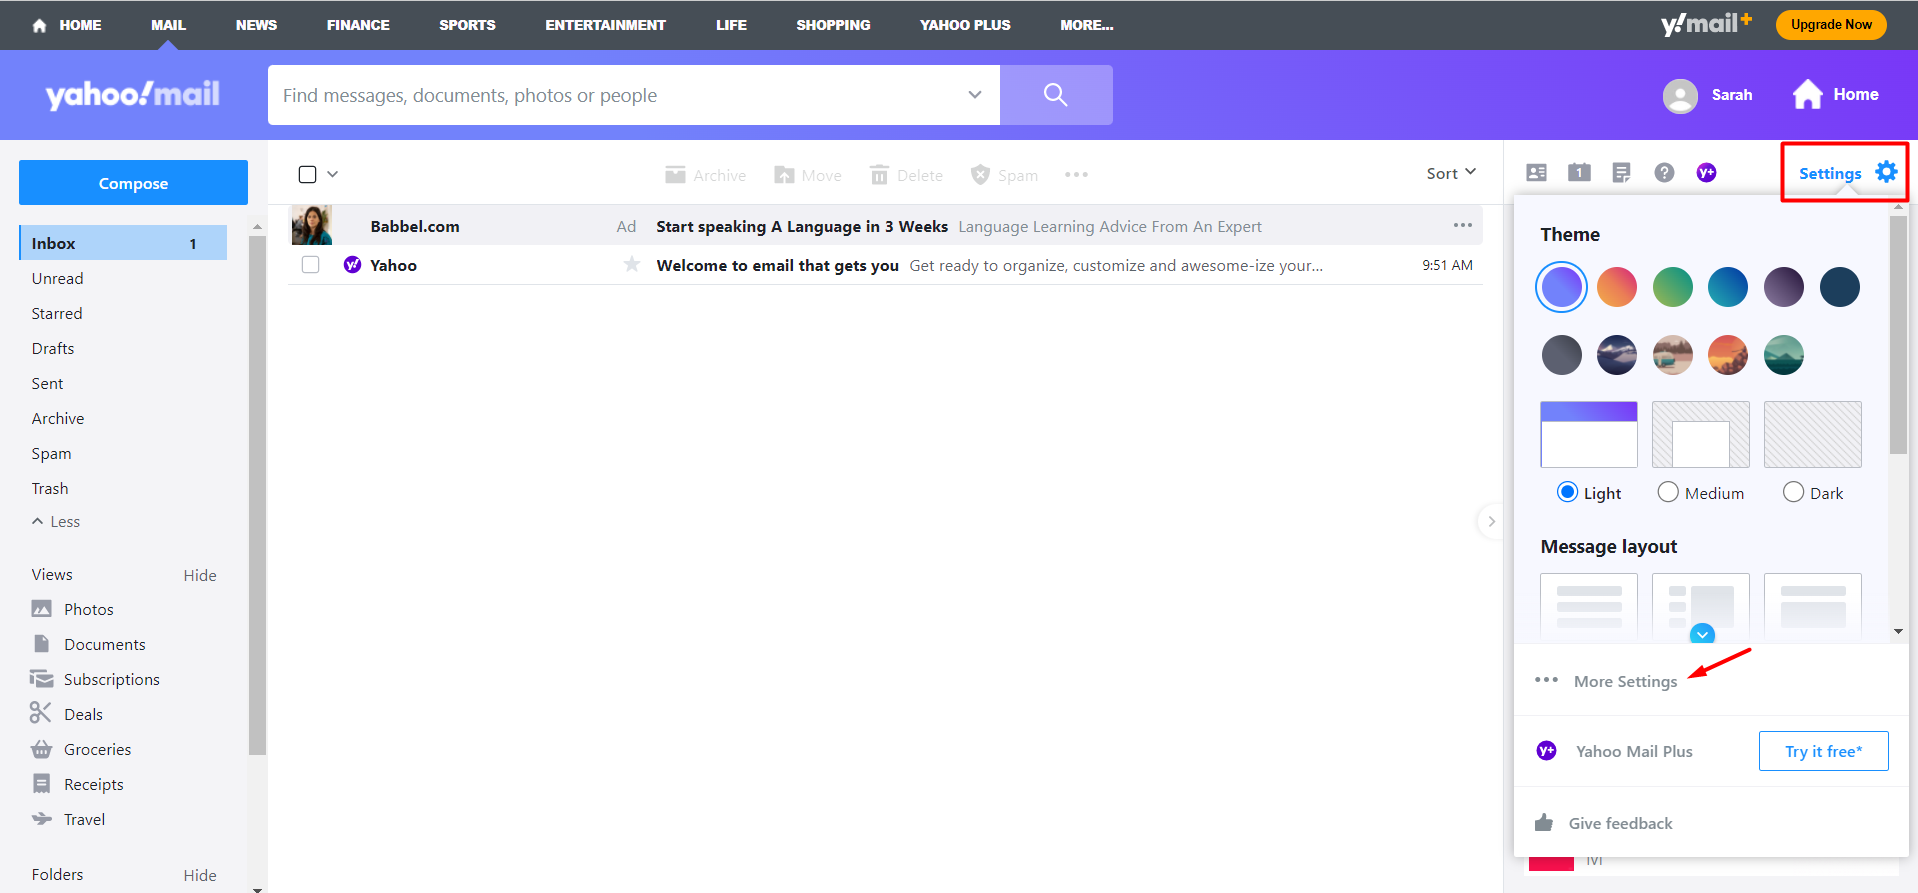
1. Navigate to the "Settings" icon and click "More Settings" from the Yahoo Mail menu:
2. Select "Filters" and click "Add" to enter Joomag domains
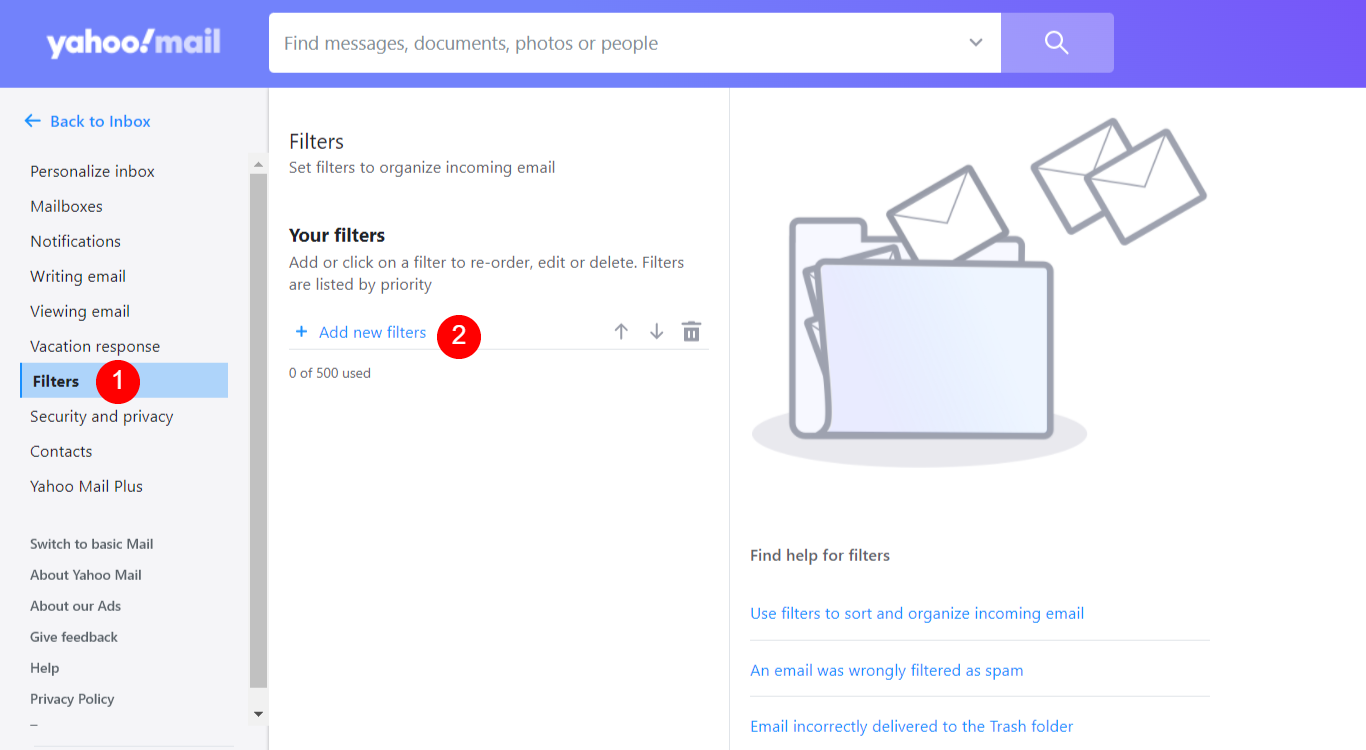
Here you should enter Joomag domains to make sure all the important emails received from us will appear in your inbox. The following domains should be entered: "joomag.com"; "mail.joomag.com"; "joomagmail.com".
AOL Mail
Note ❕ To whitelist Joomag domains in your AOL email account, you should, first of all, make sure you are logged in.
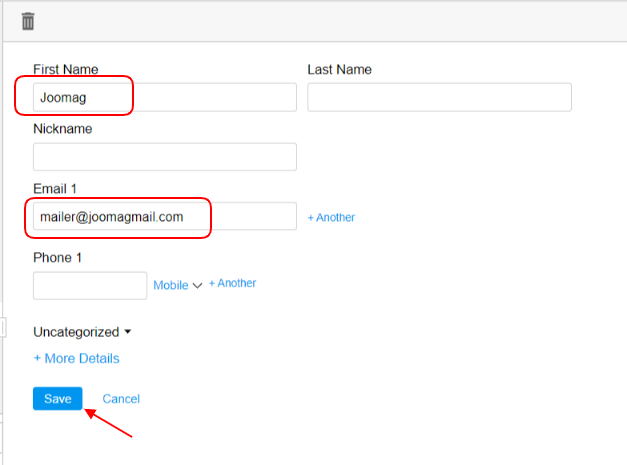
1. Click on the "Contacts" from the left navigation panel select "New Contact" icon and enter the details of the sender, that is Joomag's email addresses: "joomag.com"; "mail.joomag.com"; "joomagmail.com".
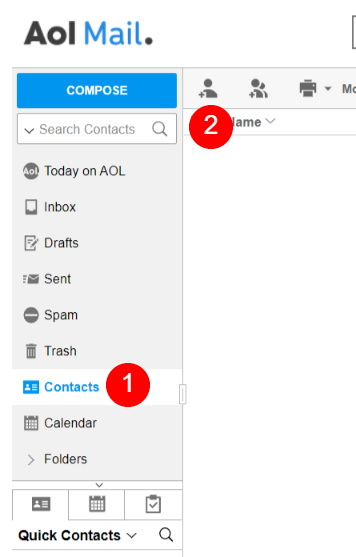
Note ❕ Each email needs to be added separately as a new contact.
2. Once the email address is added, just click "Save" button as shown in the screenshot above and voila!
Microsoft Outlook
Now let's see how to add Joomag's domains to safe senders in Outlook
1. Go to "Home" tab and click on the arrow next to "Junk". From the dropdown menu choose "Junk email options"
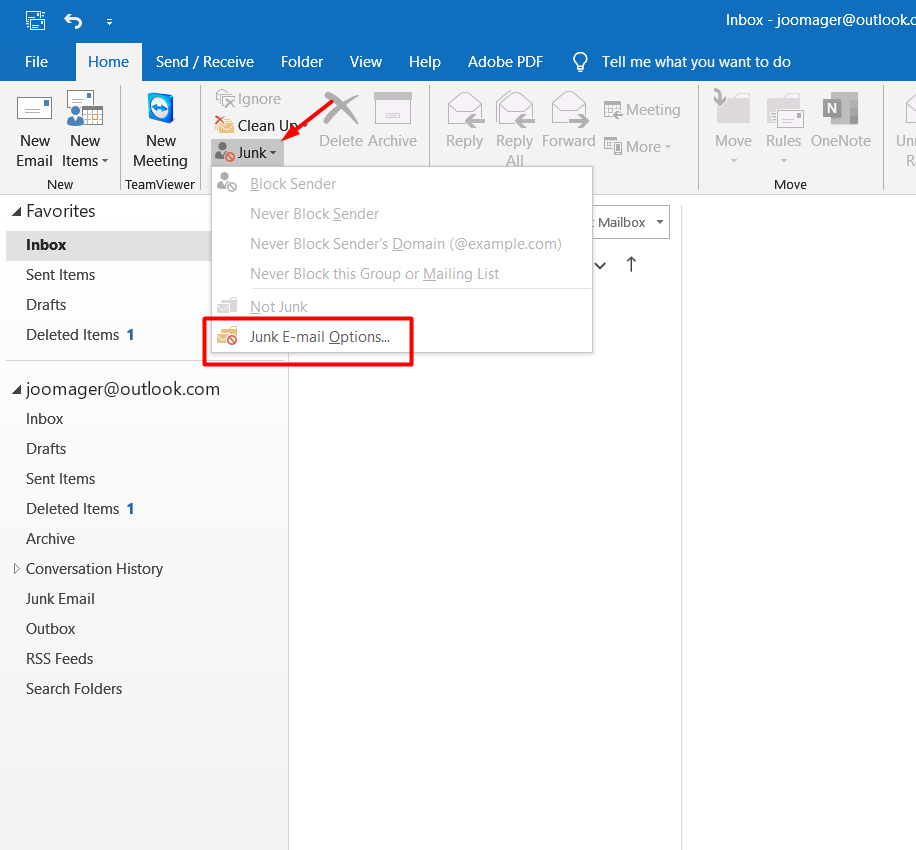
2. In the pop-up window go to the "Safe Senders" tab and click on "Add" button to specify the needed domain/email address
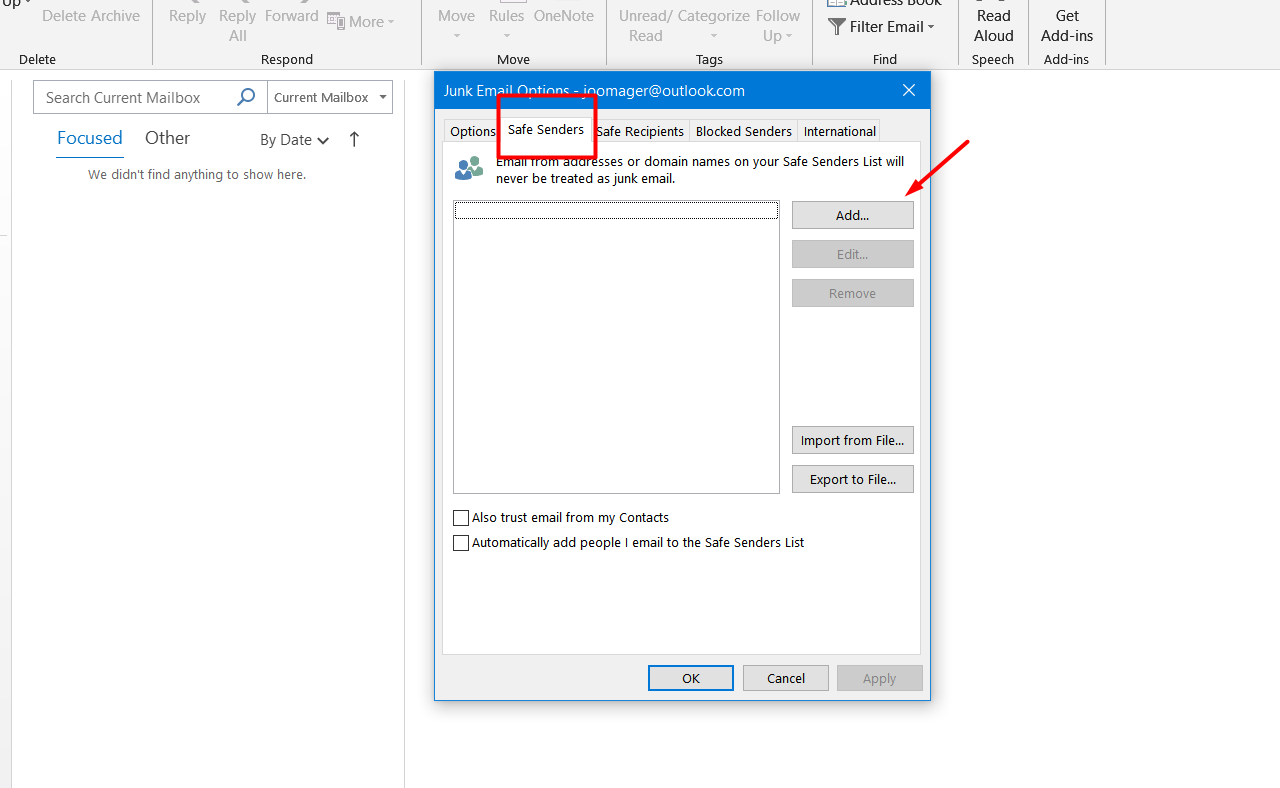
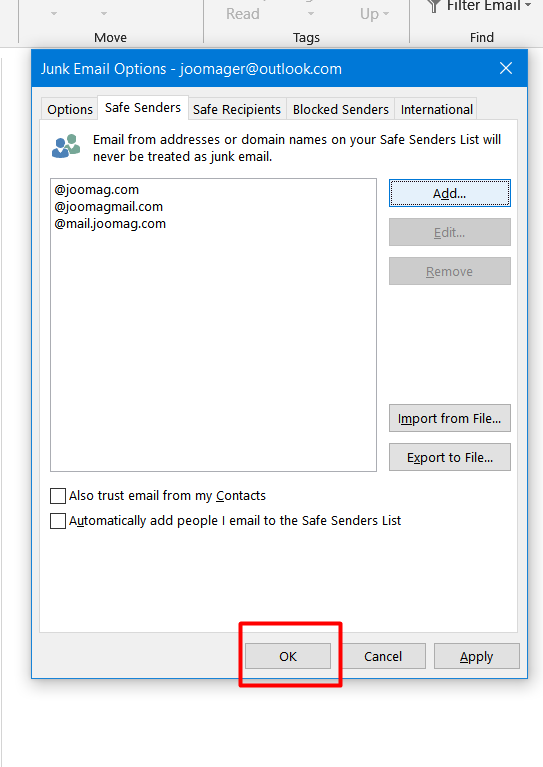
3. Enter Joomag's domain names to start receiving emails and important notifications directly to your inbox "joomag.com"; "mail.joomag.com"; "joomagmail.com".
4. Finally, when all the domains are added simply click "OK" and exit the window.
YandexMail
1. If you are logged in to Your YandexMail account, click on the gear icon in the upper right corner of your screen

2. Choose "Message Filters" option and find the "Whitelist" section in the lower right corner
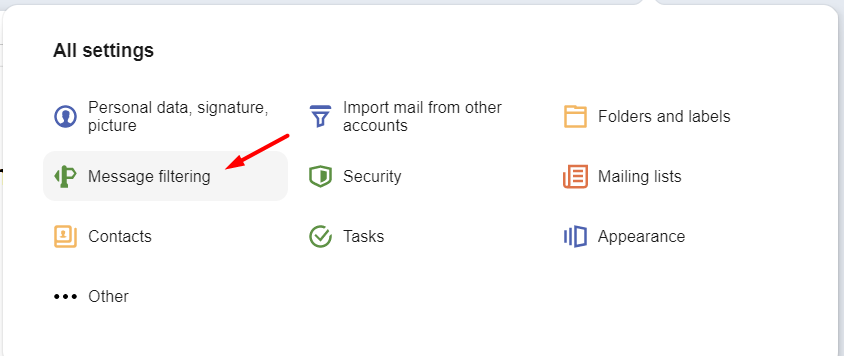
3. Fill in the necessary information such as Joomag's domains: "mailer@joomagmail.com"; "no-reply@mail.joomag.com"; "mailer@joomagmail.com".
and click "Add" button

Note ❕ Each domain needs to be added separately
Mail.com
If you need to whitelist Joomag's domains in your Mail.com mail account then follow the steps described below
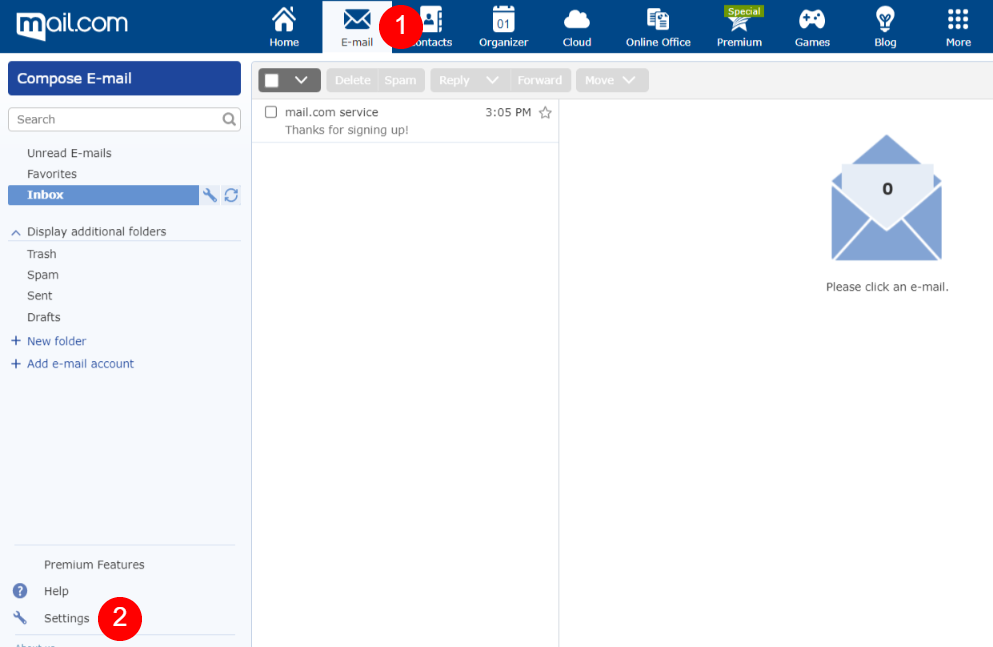
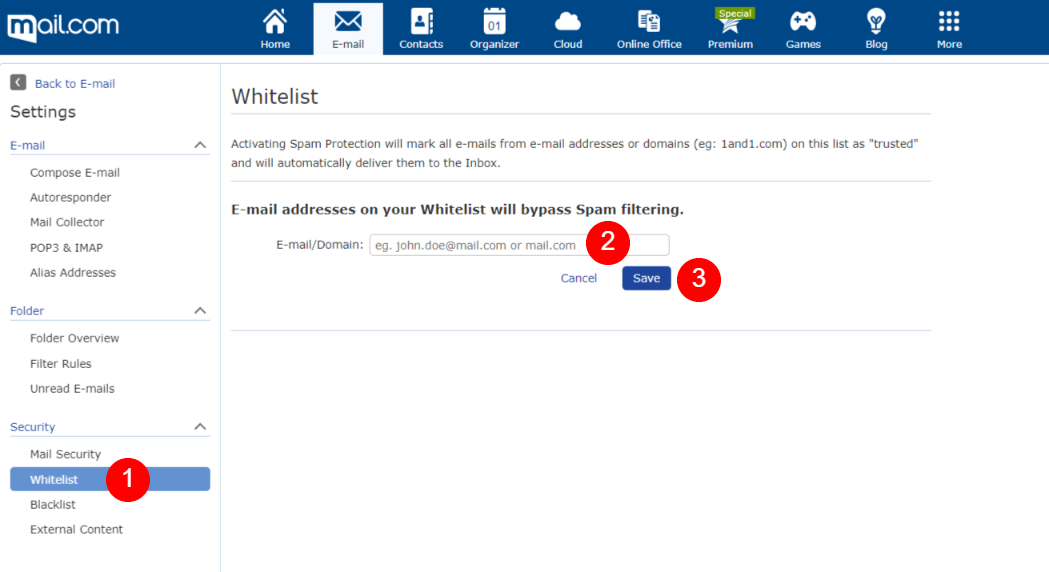
1. First, make sure you are logged in to your Mail.com account and go to the "E-Mail" tab
2. Then click on the "Settings" hyperlink at the left lower corner of your browser tab
3. Once done, find the "Security" section and click on the "Whitelist" hyperlink. Start entering Joomag's domains: "joomagmail.com"; "mail.joomag.com"; "joomagmail.com" one by one and click "Save" button
iCloud Mail
And finally, let's see how to whitelist or apply rules for Joomag domains in your iCloud mail account
1. First you need to make sure you are logged in to your iCloud mail account
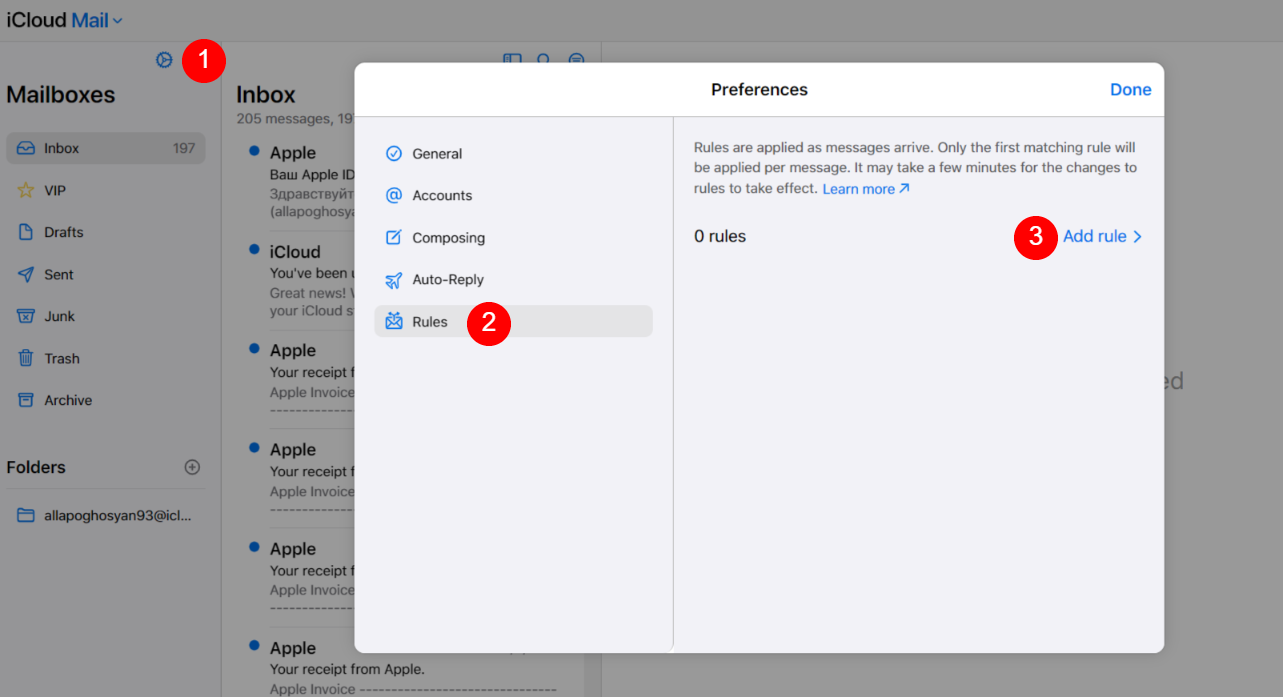
2. Then click on the gear icon ⚙ and in the pop-up window go to the "Rules" section
3. Click on the "Add rule" hyperlink and enter Joomag's email addresses: "mailer@joomagmail.com"; "no-reply@mail.joomag.com"; "mailer@joomagmail.com"
Note ❕ Please perform this action for each email address separately.
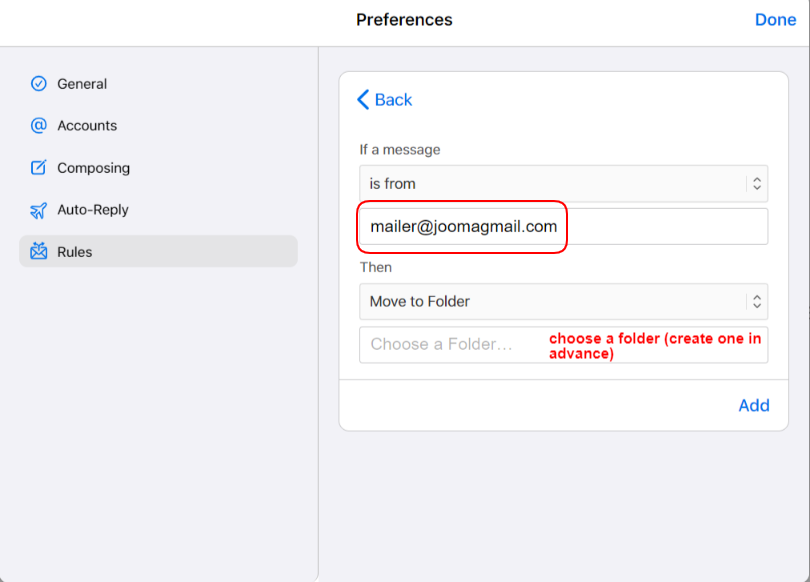
4. Once done, click the "Add" button
There you are! The filters will be created instantly and you'll be able to see them on your filter's list. This way you'll make sure to always receive important emails from us!
