If you need to additionally brand your emails and do not wish your subscribers and contacts to receive your email campaigns from Joomag but only from your company domain, then this feature is for you! Let's say you need your emails to be sent from team@sender-domain.com, then you will need to perform the following actions:
1. From your Joomag account Dashboard go to the Email Marketing
2. Then open the Settings section and scroll down to find the Sender domain feature
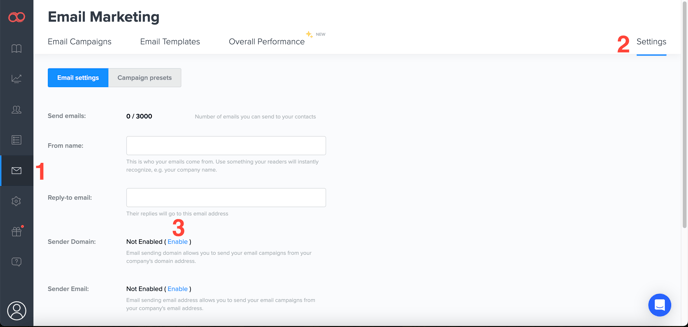
3. Click "Enable" as shown in the screenshot (step 3) and you will be directed to a page where you can enter your domain name.
After entering your domain in the corresponding field:
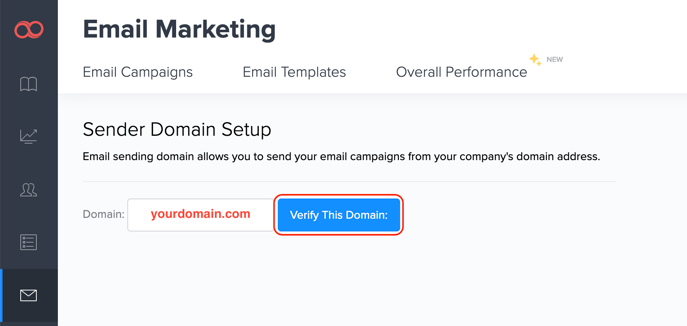
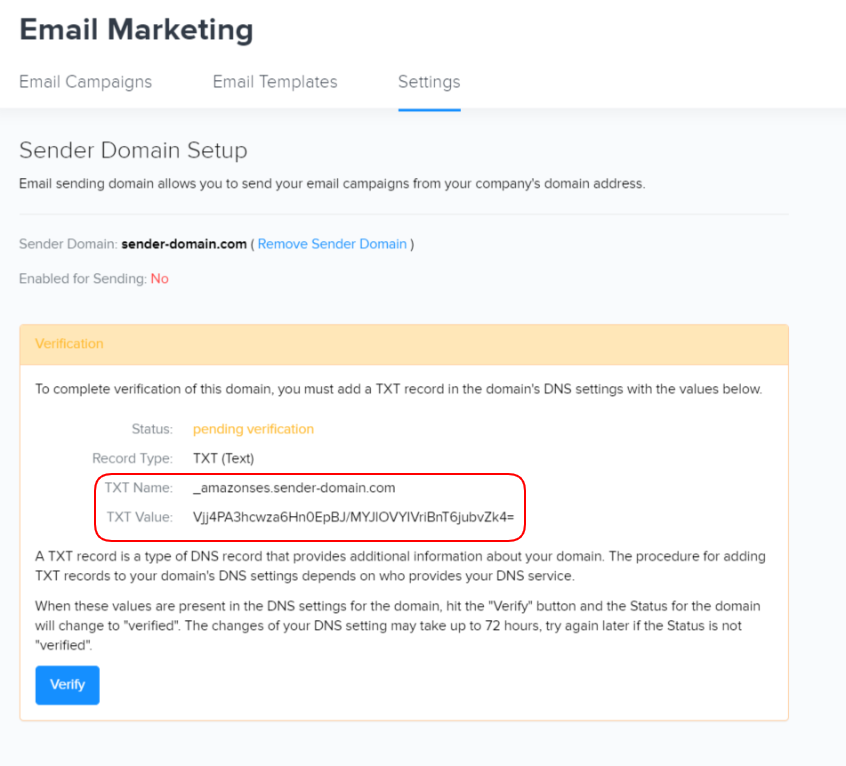
4. Click on the Verify This Domain button. You will be taken to this page to verify your domain and use the provided details as TXT records in your DNS settings
Now let's go back to Godaddy's Domain Control Center and select the domain that needs to be used as a sender one in Joomag.

5. Then click on the "Add" button under your DNS records and choose TXT from the record options drop down menu and there you are! Just enter the details from your Joomag account Email Marketing Settings section for your TXT record. For example, in our case, this information needs to be taken from Joomag
Host

Host Value

and added to GoDaddy

6. Click the Save button and go back to the Email Marketing settings and click Verify.
Note: If the verification is still showing as pending, give it some time and click on the Verify button again.
Once the sender domain is verified you will see the following on your screen:
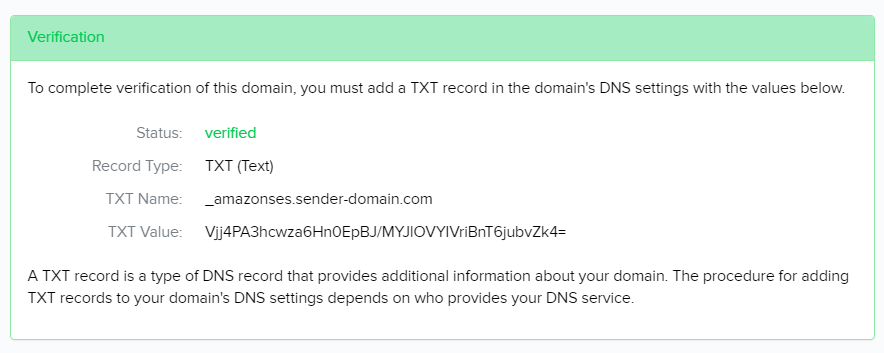

After the sender domain is verified you will need to set the MX record.
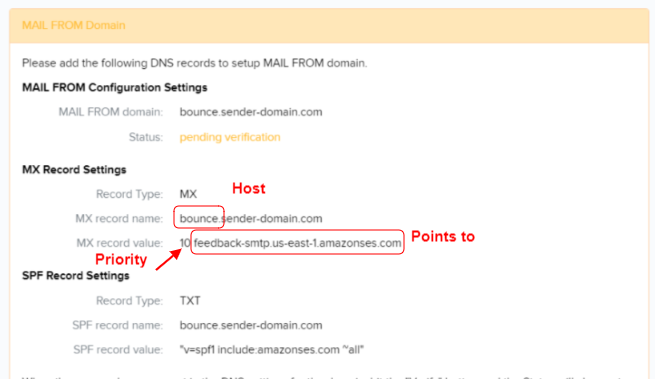
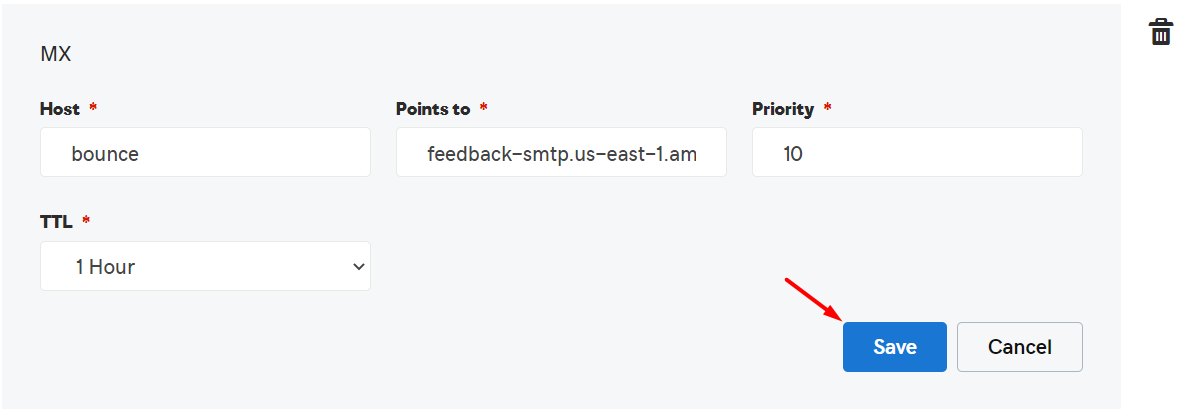
To do that, go back again to the to your domain settings, click Add button and choose MX record from the drop-down menu.
-
In the Host field add your domain or subdomain. In our case that'll be bounce
-
In the Points to field add the mail server's address: feedback-smtp.us-east-1.amazonses.com
-
Make sure to specify the priority (that is the order in which the record is evaluated and used)
7. Now, to complete the MAIL FROM DOMAIN setups you need to specify the SPF record.
-
Go back to your Domain Settings and click Add button
-
For the SPF record choose the TXT from the drop-down menu and specify the fields exactly the same way as you did for the first TXT record

8. Once all the data is filled in click Save button and go back to your Email Marketing Settings section and click Verify button.
9. Finally, when the Mail From Domain is set up, you need to customize DKIM settings for your domain. Again, go back to your Domain settings and click Add button to create a new CNAME record. See the screenshot below to make the correct inputs:


Note: Each CNAME needs to be added as a new one, so make sure to add all the three CNAMES in your Domain Settings
10. After all three CNAME records are added to your DNS settings go back to your Joomag account and click Verify button. It will take some time (a couple of minutes) to verify the DKIM settings, so keep refreshing and clicking Verify button during that time.
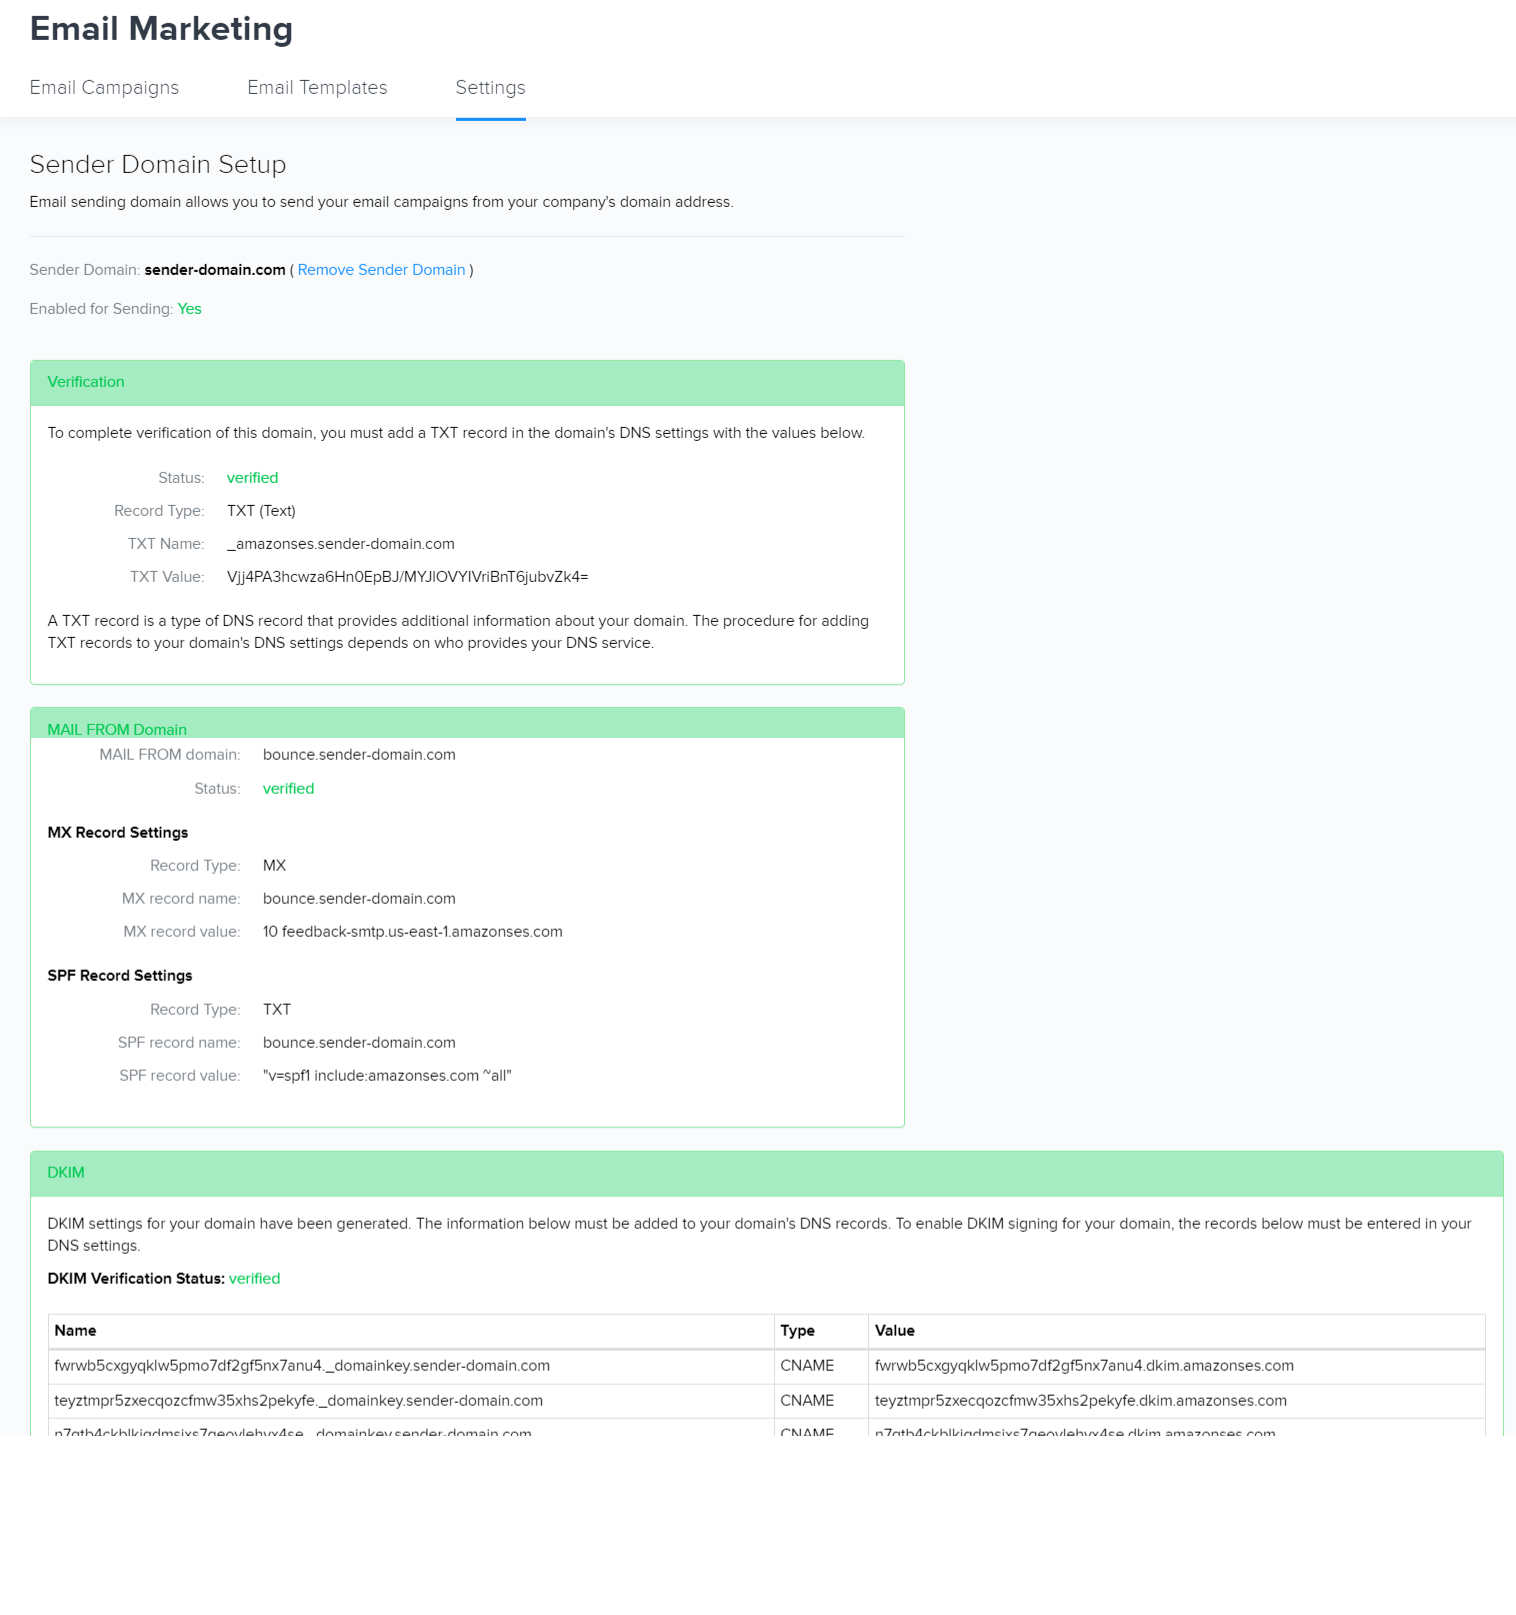
Finally, once all the set-ups are done you will see this screen which means that Sender domain has been successfully enabled and set up.
Congratulations!🎉
