To set up webhooks for the Email Marketing follow the steps below:
Important: Make sure your IT team works with webhooks.
-
Go to Settings from the left sidebar.
-
Proceed to the Integrations section and scroll down the Webhook.

Joomag provides its own set of webhooks for Email marketing:
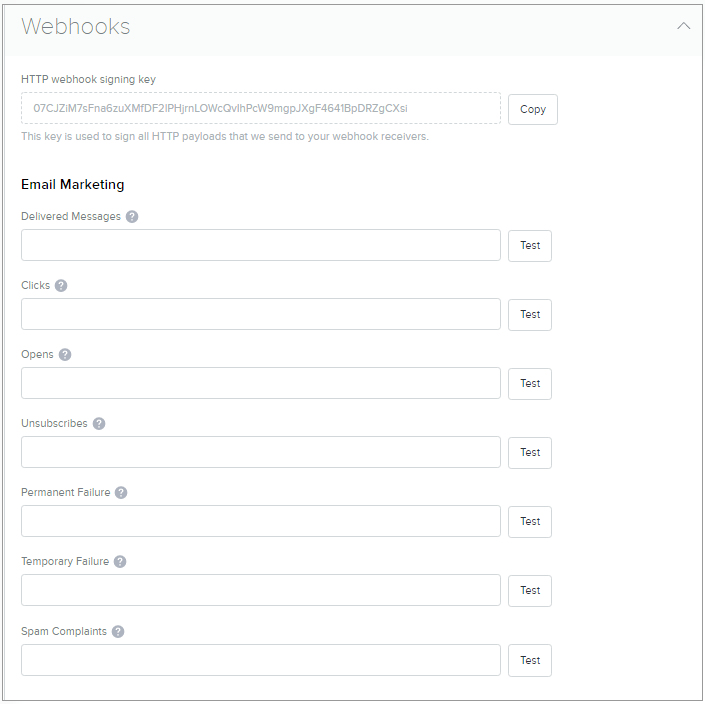
-
Delivered Messages: the email was accepted by the recipient email server.
-
Clicks: the email recipient clicked on a link in the email.
-
Opens: the email recipient opened the email and enabled image viewing.
-
Unsubscribes: the email recipient clicked on the unsubscribe link.
-
Permanent Failure: we were unable to deliver the email because of Hard Bounce.
-
Temporary Failure: we were unable to deliver the email because of Soft Bounce.
-
Spam Complaints: the email recipient clicked on the spam complaint button within their email client.
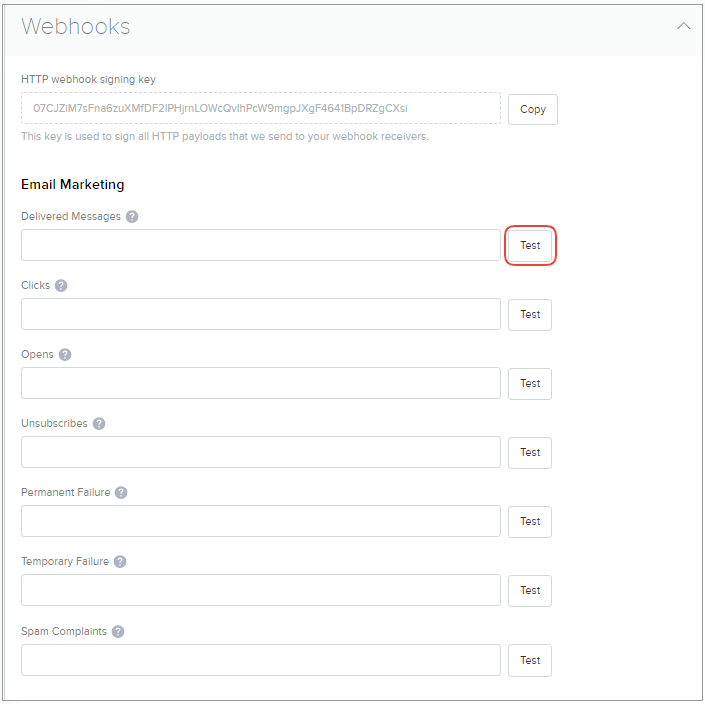
3. After filling the URL click the Test button to get validation.
4. Once you're done, click Save changes.